Saab Link Forums banner

jdwertz's Le Mans Blue SPG project thread

34K views 185 replies 35 participants last post by  jdwertz  
#1 · (Edited)
Ok so here goes. As some already know I recently purchased a Le Mans Blue c900 with a few goodies attached.

Image


General:

strip and clean interior
clean carpet
install Corbeau seats
replace floor rusters with sound damping material
reupholster door cards
reupholster headliner
paint door sills and other random body parts black
remove and paint whale tail
remove and paint spg kit and wheel arches (still need to get spg arches)
replace rear corner lenses
replace driver's side headlight assembly
install bosch amber fog lights
run new speaker wires
install new stereo
new rotors and pads all around
new steering wheel
new dash
new badges
rear metal louvers
replace turn signal stalk
mac mini install
buff paint

Engine:

plugs, cap, rotors wires
new fluids all around
new oil filter/fuel filter
adjust timing
New exhaust (stock or custom)
de-grease

Suspension:

new shocks
new bushings
Intrax

I am going to keep this thread updated with the progress I make. This car is in no way going to be a show car as I am going to be rebuilding it on a budget. I am going to update the thread later this week with a to-do list. But for now here is the car.

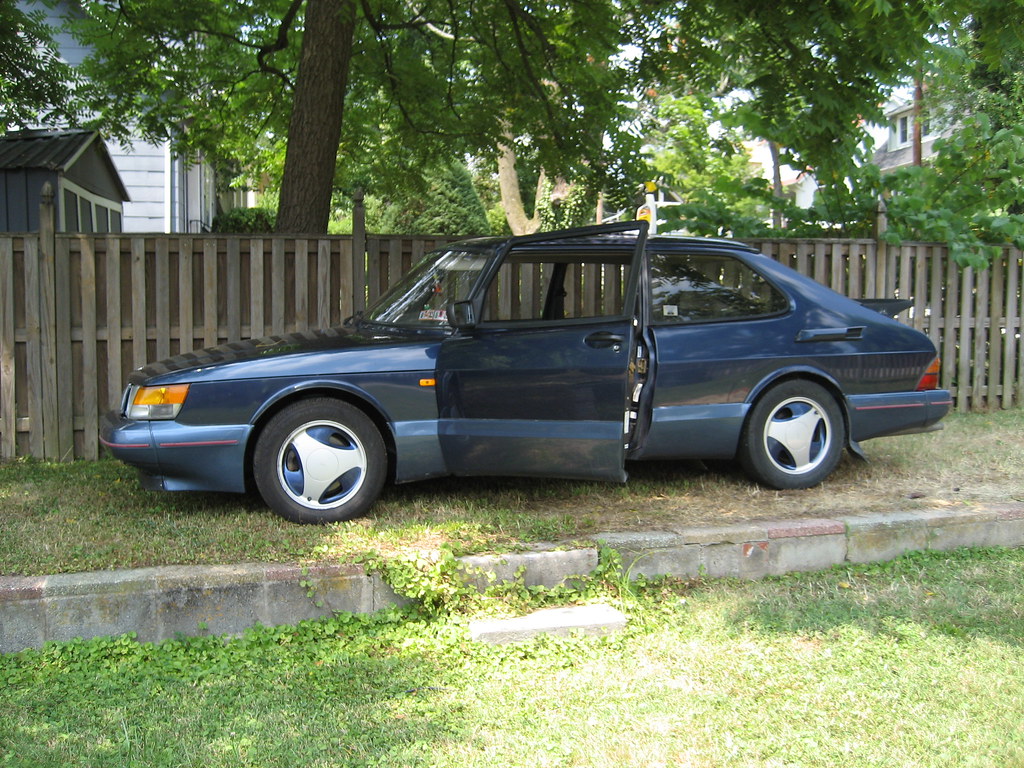
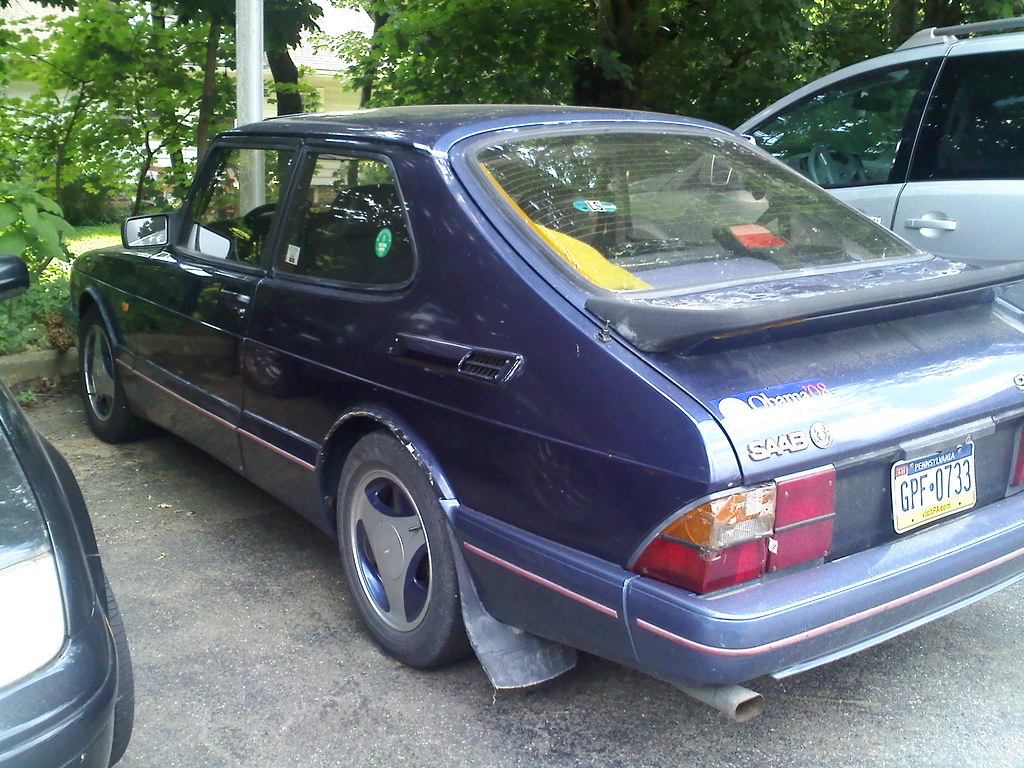
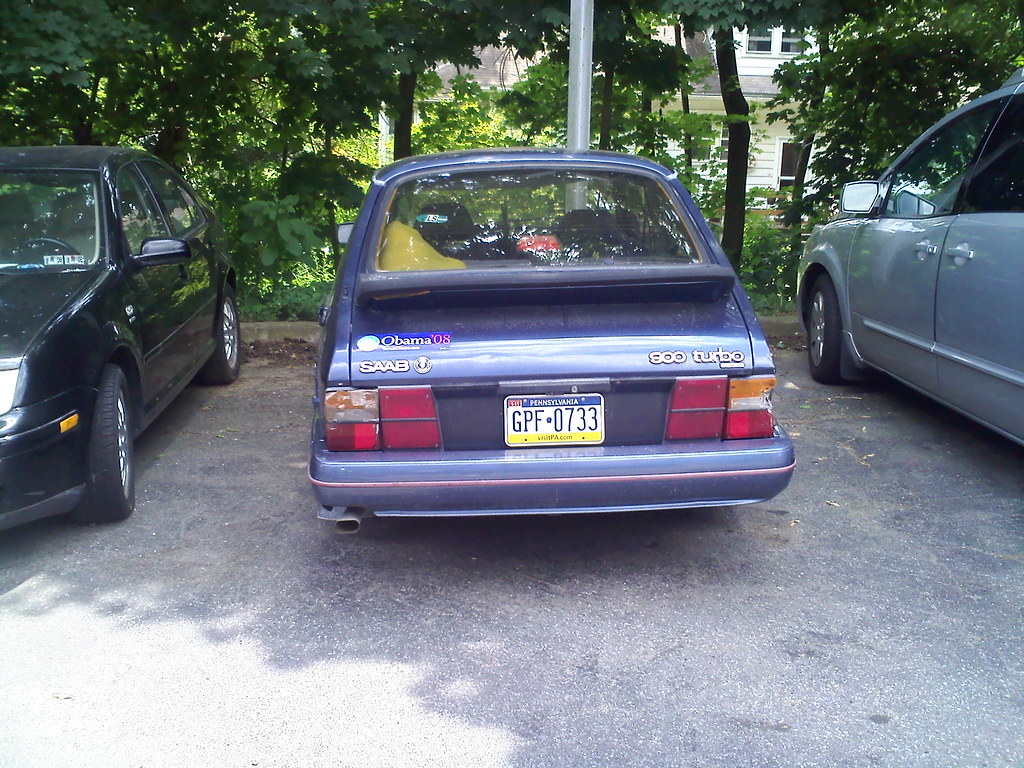
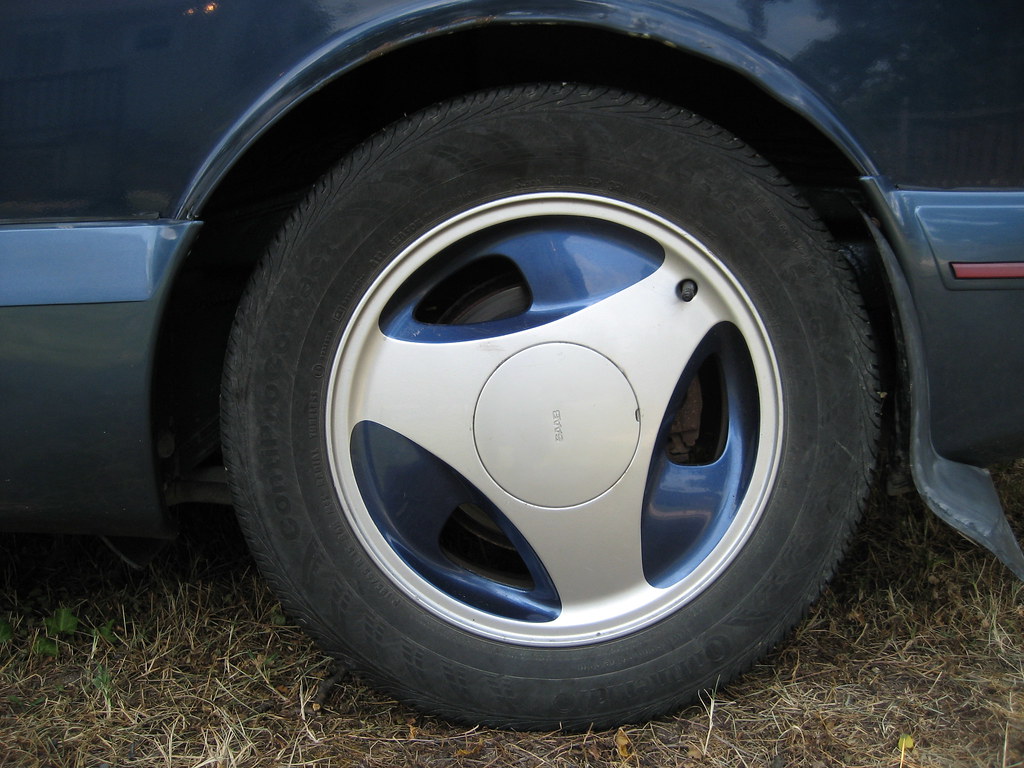
Pictures from before I picked it up:

Image


Image

Image


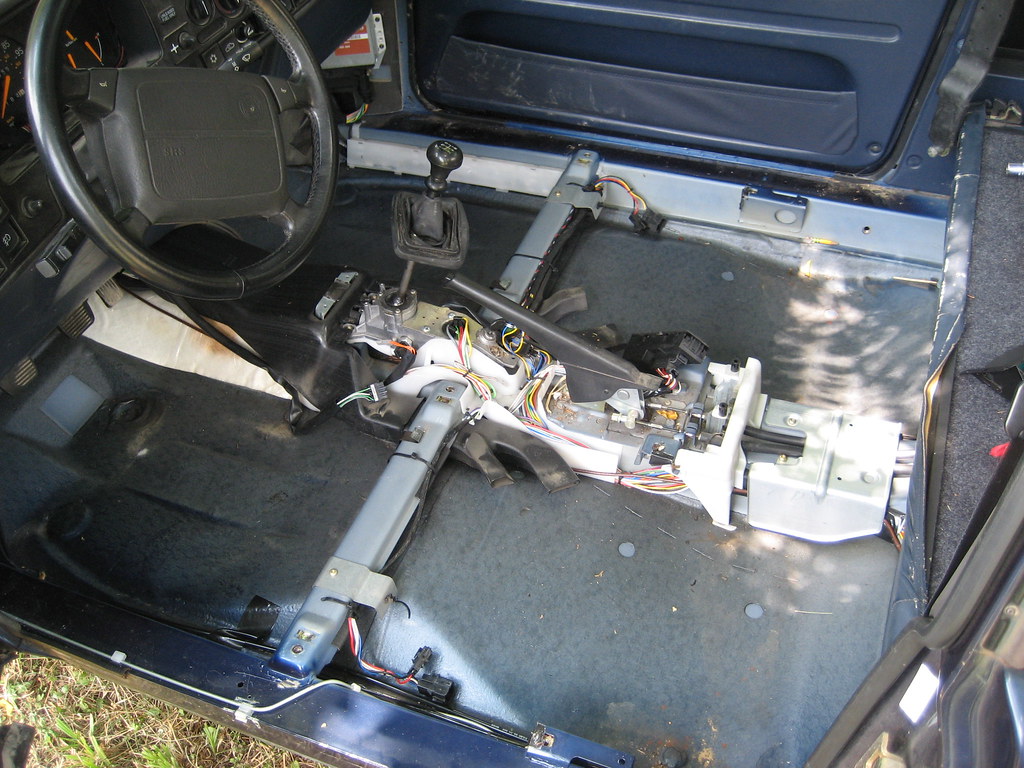
After a few hours work:

Image


Image


Image


Image


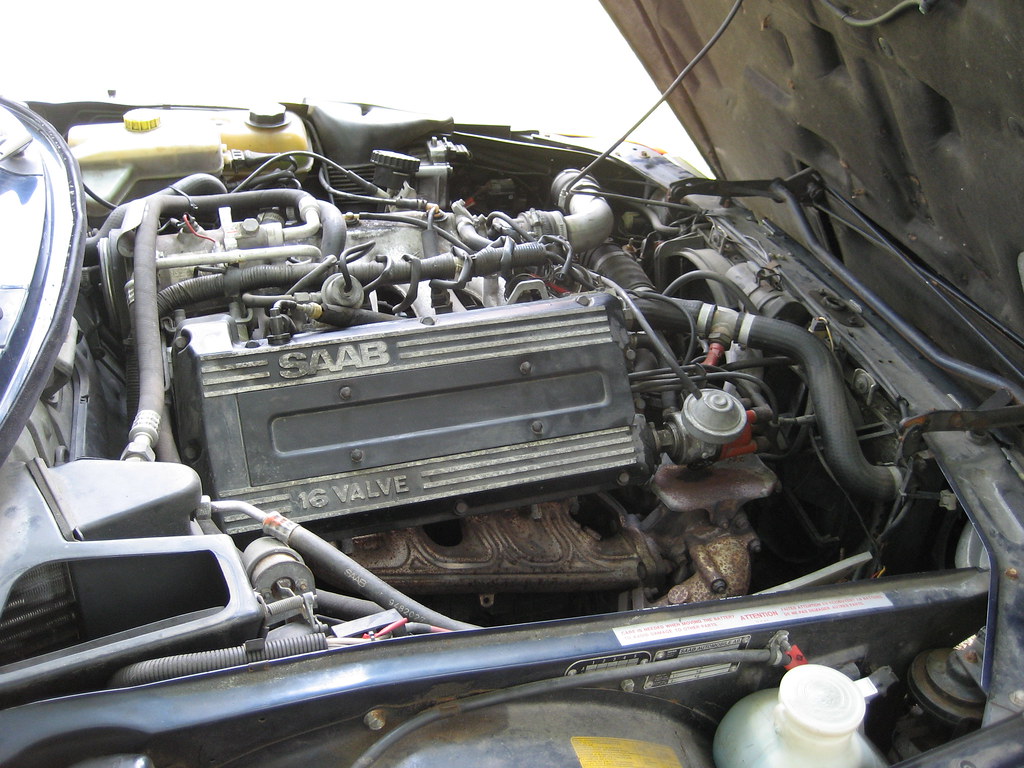
Haven't touched the engine bay yet

Image


Needs some paint and the missing piece replaced.
Image

Image


Image


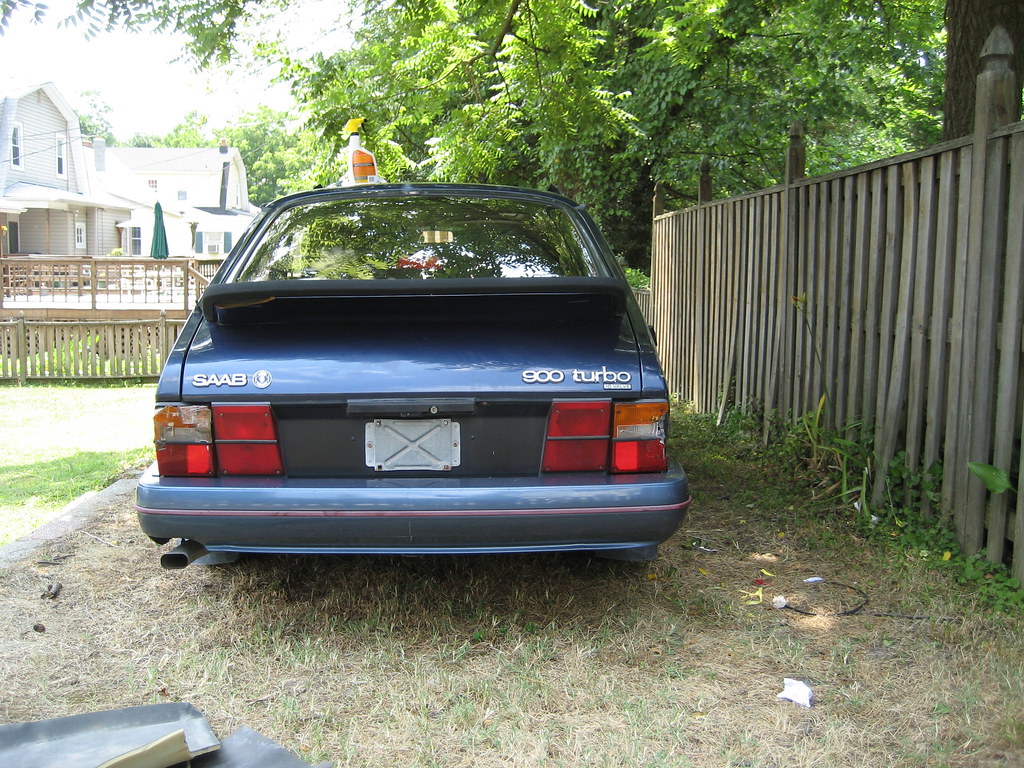
Needs new front and rear bumpers...

Image


Image


dash effed... I told the seller I would only take the car if he threw in the frog :D
Image


pic for turbocon

Image


removing the rear panels

Image
 
#2 ·
Very cool!

I kinda like the wheels painted like that--different.

If you plan to take the rear seat back out, there's a trick to it. Don't just try to pop the ends out of the retainters by using a pry bar. Remove the little spring clips first, then with a pair of needle nose pliers pull out the plastic spacer ring on the pivot shaft. Pulling those spacers allows you to slide the channel that they were in over to the retainer and just slide the seat up, no prying (or damaging) necessary.
 
#3 ·
yea the wheels are not bad. I haven't decided yet what I want to do wheel wise....

rear seat is already out. I did it just the way you mentioned and managed to not damage anything thankfully.

the car is in need of many parts but I will wait a bit until I get the interior finished. Now I need to decided what color to recover the door cards and headliner...
 
#4 · (Edited)
I just picked up some royal blue microsuede fabric at JoAnnes Fabrics on Thursday to do mine. My vert has grey interior, but I want to do the door cards and speaker covers in blue. The fabric matches the paint color almost perfectly. You only need about 1/2 yard. I also picked up some padded headliner there to use as backing. That was on clearance because they are discontinuing it. I walked out of there for under $20--good deal.

They also had a fabric that looked like black leather. It was thin because it was fabric, but it looked just like heavy textured leather like they use on leather jackets. I was tempted to get that but had my heart set on blue. It would probably look good in your car as the texture would look good with the black dash.
 
#10 ·
Looks great! That car is begging for an airflow kit.
I agree an airflow kit would be sweet, but my budget on this will prevent me from spending $800 on a kit....Unless I can find just the front and rear bumpers cheap.

Looks very nice! You definitely got a great deal. Any rust or major problems? What are your plans for her?
thanks! I have only found one spot of rust on the passenger door near the latch, a little bit of surface rust starting to show on the lower door sills but not much. I am currently throwing a list together of things it needs and I might use this as a DD and retire the Commed to the garage in PA for weekend driving only.
 
#11 ·
While the wheels are especially unique, I'd personally opt for Aeros or Super Aeros. I would not, under any circumstances, paint the wheels on the car. Directionals are cheap and the paint scheme on the current ones would be difficult and expensive to duplicate. Either keep them on the car or save them for the future.

Also, like others said, losing the red trim would help. And as for getting new bumpers, I wouldn't worry about the damage you showed at all. To me, they look pretty good and I wouldn't mess with them unless you planned on changing the ground effect color from blue to charcoal/black. I'd keep it all the same color if it where me though. The blue looks great from top to bottom! Big pluses for the whale tail, vent covers, etc too.
 
#12 ·
I have been debating this over the past week... what color to paint the kit? It needs to be repainted no matter what, and I think using Duplicolor wheel paint would be cheaper than ordering spray cans of Le Mans Blue. I don't have a paint gun so I have to do it all in spray cans. I think I am going to go for the look Palmer has on his spg. Maybe in the future if it gets an airflow kit I will get them body matched.

Louvers are also a must, I just need to find some...I plan on re-doing door cards and the headliner this weekend and ordering my dynamat so I can start putting the interior back in! Anyone have a recommendation on a good carpet cleaner?
 
#14 ·
Very nice looking car! Is/was that a factory wheel paint scheme, or something done later and very professionally? I've not seen the like of them before, and I thought factory was solid silver, or maybe grey(?)
 
#17 ·
#18 · (Edited)
I wouldn't use Duplicolor Wheel paint on flexible plastic parts. You need paint formulated for it. It has to have a certain elastomeric content. SEM bumper coater is a good paint for SPG panels. Or Duplicolor makes a flexible trim paint--just not sure if they make the right color. Plastic parts expand and contract with temps so the paint needs to be flexible as well. SEM Charcoal Metallic Bumper Coater #39273 is what most people use--perfect match for OEM.

Weather conditions and technique will make a big difference in how the paint goes on and dries. 70 degrees, no wind (if painting outside) and low humidity is optimal. Don't spray in direct sun, and lacquers don't like humidity. Spritz on a light coat first and let it set up for 10 minutes or so. Then follow with two more coats 10 minutes apart. The last coat needs to be wet enough to give proper gloss but not wet enough to run. If you put it on too light or spray from too far away the paint will set up to quick and it will not flow out. Spray in long even strokes across the whole part. Start spraying a little off to the side of the part and spray across it then let off the nozzle when you clear the other end of the part. Nozzles tend to splatter at the initial pressing. You don't want that to happen on the part. Don't move the can around in circles in one area, you'll get uneven coverage. Let the paint build and cover with several coats. Don't try to get full coverage with one shot.

You can watch some "how to paint a car" videos on YouTube. Spraying with rattle cans is really the same technique as spraying with a HVLP gun.
 
#19 · (Edited)
I've tried the SEM bumper coater turbocon mentioned and I wasn't impressed with the results. I did proper sanding, prep, etc and the product didn't match well or provide good coverage. It's also not cheap with a can running between $10-20.

If you want to use anything, I would recommend cans of SEM Charcoal TRIM paint. I used it on airflow vent covers and SPG wheel arches and was much happier with the product vs. the bumper coater as the coverage was MUCH better. The 39273 bumper coater would just not match my extensions or SPG kit on my 91 SPG. While such might be due to time, wear, and sun fade, I think the trim paint is superior. I'll be doing my entire SPG kit & extensions with it.

As for the duplicolor, it's tricky. I tried it once last year and had adhesion issues and such might explain the issue you're having. Make sure you wet sand or scuff the panels and use a good primer.

edit: IMO, wetsanding is essential, especially after the first coat of primer or paint.
 
#25 ·
Another cheap alternative is Duplicolor bumper coater. They make it in a charcoal color that is just a tad lighter than the stock SPG kit. I tried it on some extensions recently and you can't beat the availability, ease of use, or cost. I think it would be a good economical option if a whole kit, including bumpers, was being repainted (which is what jdwertz is apparently doing).

link (although you'll be able to find it in any pepboys, advanced autoparts, etc):
http://www.summitracing.com/parts/SHW-FB109
 
#26 ·
yea I actually tried the duplicolor trim paint. I have tried so many different paints and colors trying the find the color that I really want. I want to go a bit darker than the factory spg color and I think the duplicolor is the way I am going to go.

On another note me and my roomate reupholstered most of the interior including the headliner last week. Got new seat bolts, as I hateeee the factory bolts. Put the still destroyed seats in for now until I get my Corbeau A4's recovered and fix the Commed seats. I will post pics once I get the spg kit painted and back on!

also goodies to come soon :D
 
#36 ·
might be a dumb question cause I know this topic has been destroyed on this forum but I am having boost spike issues! I did the 900aero apc mod. I am boosting up to 14-15 psi then dropping to 10 very quickly...

So far I have done

3.0 FPR
set timing to 16 degrees
basic tune up (cap rotor plugs wires)
replaced all vacuum lines with silicon ones

should I retard the timing?
 
#38 ·
Dude... Its Like 90+ degrees Farenheight when your Trying to do this. If the Car is working correctly that's all you really want. Trust me. Its Cheaper this way. Go see what you get for Boost at Night when the Temps get down to at least Low 70s. Boost NOT so GOOD!!! For the Rod bearings and Pistons, Head gasket Etc.. when its WAY hot out side like it is now.
 
#39 ·
I will give it a try.

Dude... Its Like 90+ degrees Farenheight when your Trying to do this. If the Car is working correctly that's all you really want. Trust me. Its Cheaper this way. Go see what you get for Boost at Night when the Temps get down to at least Low 70s. Boost NOT so GOOD!!! For the Rod bearings and Pistons, Head gasket Etc.. when its WAY hot out side like it is now.
true it was hot as anything out today. Maybe I should just say screw it and wait to T5 it before adjusting boost, all this distributor stuff is annoying...
 
#40 · (Edited)
made some progress today, I mounted the intercooler, cleaned up some more of the interior, and got the shifter in with a custom knob I made. All I have left now before T5 is to run the intercooler pipes and mount the spg kit(maybe).

any ideas for a cheap way of keeping the spots I cut from rusting? I also have to go back in and clean up my cuts a bit with a grinder.

It looks crooked in this pic but I assure it is straight and centered!

Image