

I don't have many Pics right now, and this is only version 1, there will be more revisions. And since no one has really made a good walkthrough so here is my attempt.....With that Said heres one way to make this upper motor mount work.
First, since our head has the same bolt holes as the 9000's it is relatively easy to mount the engine part of the mount. However some cutting of the mount is needed so that it can clear our serpintine belt tensioner. (its a bit different setup on the 9k, so all four bolts are used, on the 900/9-3 only the upper 2 holes are used.
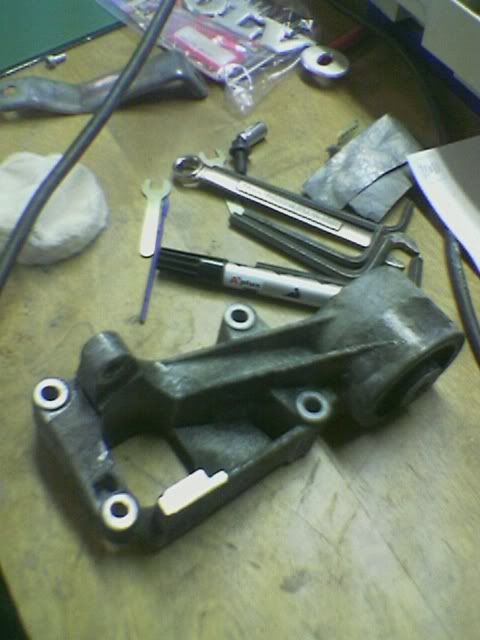
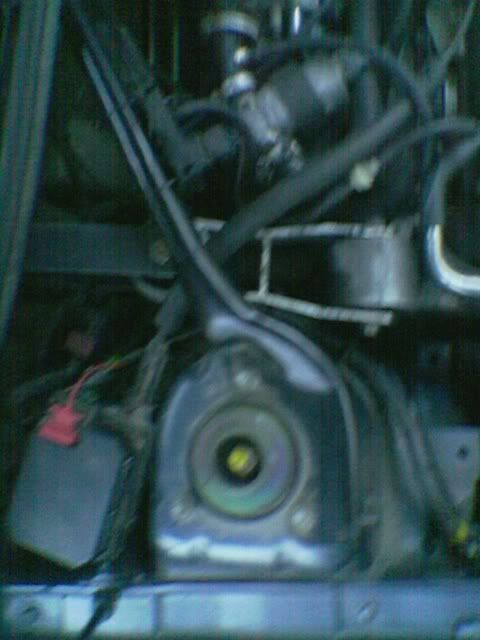
This is the mount how it is Stock
![Image]()
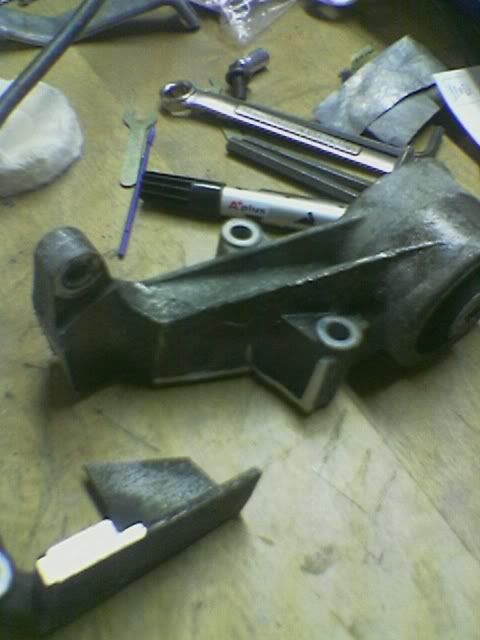
What needs to be cut off...
![Image]()
Another shot
![Image]()
The aluminum is pretty soft, I used a Sawzall And some wd40 shot on the blade every so often to help it along. Just put the mount in a vice and go to town, a fairly long blade on the sawzall usually makes things easier.
I left the part going down between the holes, just to add strenght to the mount, its not too crucial as this is a secondary mount however it doesnt get in the way of anything so it can stay.
Once this is done you can bolt this on to the head. I bought Stainless stell M8 1.00 thread pitch 50mm long, they probabaly could be a bit longer but these seem to work great, I also through some lock washers on there for good measure.
You also now have to decide how you want to mount the mount to the car, there are a few different ways, one being to drill a hole in the strut tower brace, that requires shortening the mount, some have welded a sleeve to the strut tower brace, and Ricot83 made a crazy SS bracket off the strut tower, but he had access to a plasma cutter and the steal. I choose my method for now as a quick way to see if this made a differnce. I am not saying its the best, and I am sure there are otherways but heres my experience so far.
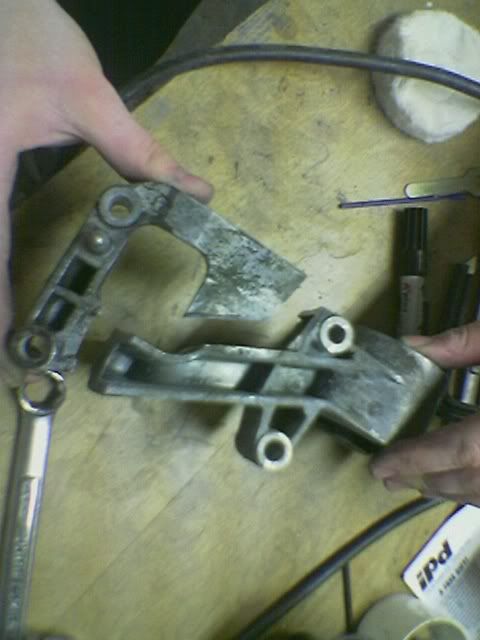
Revision one
![Image]()
![Image]()
This was with the stock buhsings in the mount..they were pretty beat up, lots of RIps. Also I am sorry I dont have pics of fabricating the U mount. Honetly this part was pretty simple, however I used some pretty thick flat stock for the U bracket, and I had to use my friends Oxy/Acetylyne torch to heat up the metal enought so it would bend easy.
A hole around 10 mm was drilled in the flat stock to mount the bushing and then a small hole was drilled in the back of the U bracket to mount to a small stud that was tack welded to the quasi firewall in that area.(It is the piece that branched off the firewall and under that plastic shoruding between this and the firewall is the climate control stuff/climate air filter...might as well change it if your in there)
Now a Word about this small stud sticking from the firewall, SPATL to my knowlege was the first to notice this stud and use it, knowing it would most likely rip out, as it was only tack welded to the steal. Sure enough his did rip out, however I decided to use it for the time being to see/feel any difference. Well the first test drive I definetly noticed a difference, but shift still felt sloppy so I realigned the shifter (I have a MP short shifter) and things got better.
2 days later I popped the hood after I heard a poping sound (when going in reverse up a hill...makes sense as it put some stress on the stud), and sure enough the stud had ripped through. At this point I decided to buy the Poly bushings from Eeuoparts...30 bucks each and since they are right across the state from me they came the next day..free shipping too
I managed to almost hammer one old bushing out but it was a bitch, I wound up going back to my old highschool cause I was pretty friendly with the shop teacher and he let me use the Hydrualic press. (any machine shop or well equipped mechanic can do this for you, for very little $$ or maybe even free if your nice...another suggestion is fill the stock bushings with plumbers goop)
My next revision was to utilize the now aproximately 10 mm hole in the "firewall". I cut a piece of flat stock about 4 inches long and drilled a 10mm hole in the center of it (this is to distribute the load over a large aread to reduce any stress). I then stuck the bolt through this and then throught the "firewall" and bolted everything back up.
Well HOLY CRAP, it made a buch bigger diffrerence, for a while it made a bit of a squeaking sound, but I think that was just the burss left from the tackweld rubbing agaist the flat stock. Because of the stiffness of the poly there is some more engein noise transmitted into the cabing (almost as if you can hear the valve train werr) but its not very loud and easily concealed with music, or maybe some sound deading added behind the glove box.
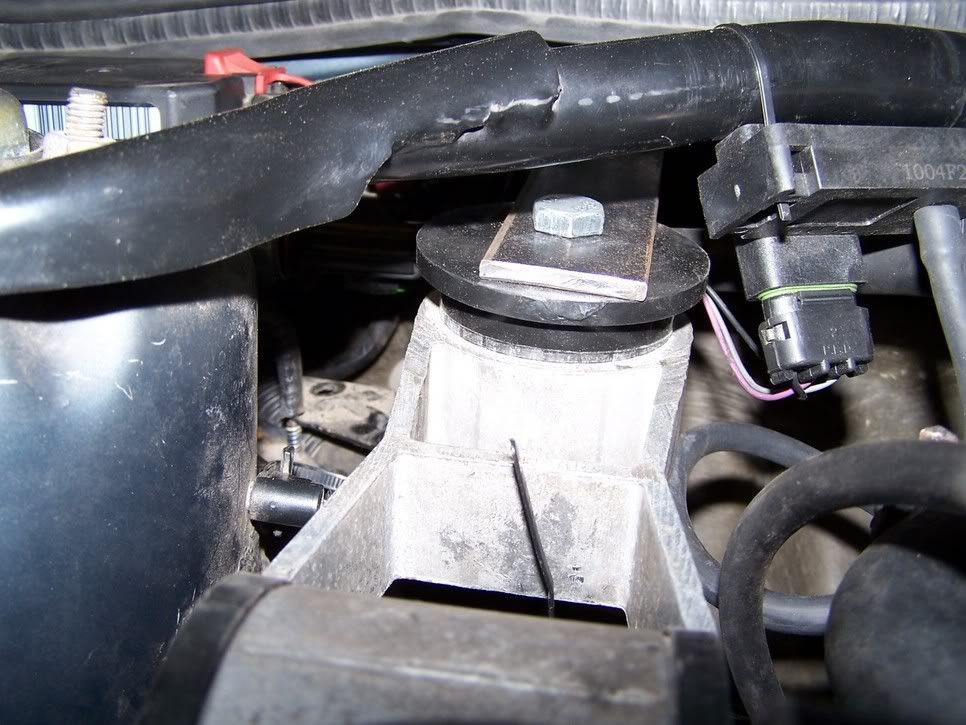
Revision 2
![Image]()
![Image]()
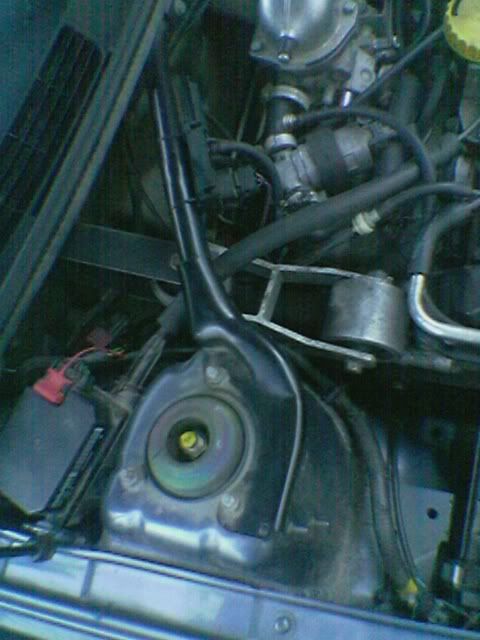
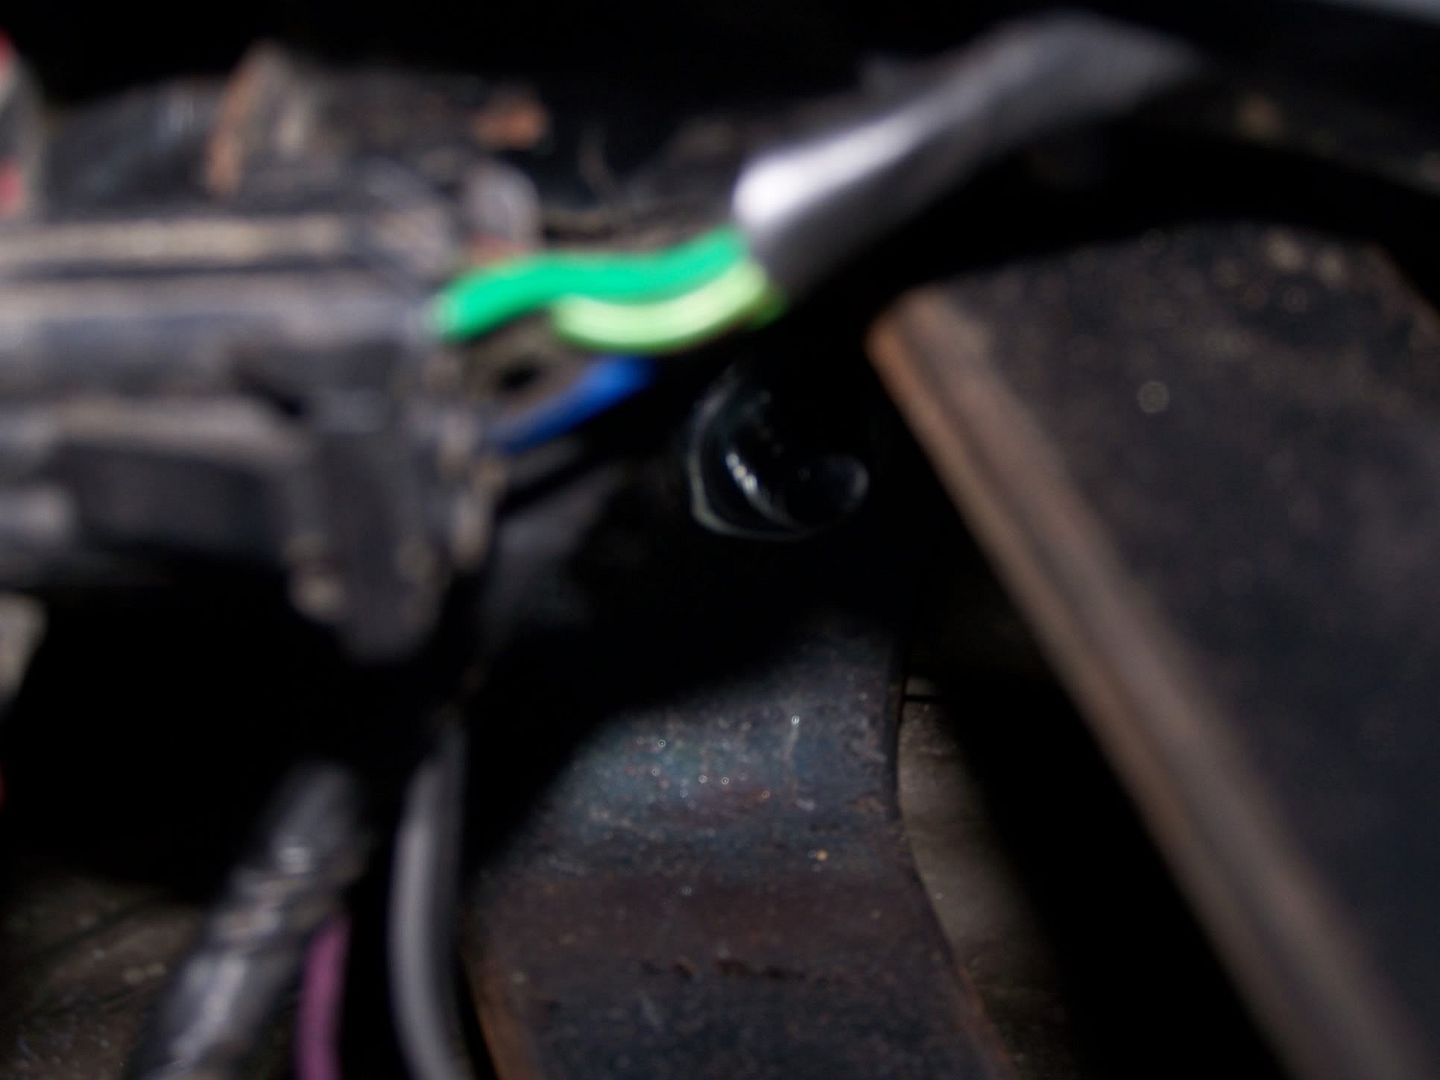
Crappy photo of bolt throug the "firewall"
![Image]()
That is my mount so far, however I had many Ideas before deciding to throw this one together. My other Idea was to traingulate the mount, and put another hole in the firewall, (this would be similar to the stock 9k bracket but much longer, as seen here)
![Image]()
This is because My fear right now is that it is to some extent acting like a hinge, and could be mooving side to side under load...I shall see on the DYNO and hopefully post a video!!
However I dont have the time right now, and also my best friend with the welder is still at school for his last term, when he comes back in late december he is going to teach me how to weld and I am going to fabricate a new mount to my liking, for now however to remedy this problem, I will most likely take a piece of flat stock and go from the strut tower to the mount to form a "L" bracket and keep it from mooving side to side.
The results. After the Poly's I actually found the shifting to be worse :shock: , the reason I concluded was that the engine was now rotating back unevenly, as now it would rotate back on the drivers side, but stay stationsary on the passengers, still throwing off the linkage, however I did not fear because I orderd Genuine Saabs Poly mount, a month and a half ago, and with a big ordeal with backorderd (not there fault but kinda sucky lol) and then freekin UPS..see here
Well finally yesterday I got a chance to intstall it, it make a big differnce, shifting is great now, However I think the saab savior short throw shifter could make it better then the MP one, it grinds sometimes now, but I think that is just because I am not used to it working "correctly" lol Plus once the new clutch goes in the tranny is getting fresh MTL whatever it is saabs number is haha.
the tranny mount pic is in the "See Here" Link
I hope this is helpful, questions coments....post away
First, since our head has the same bolt holes as the 9000's it is relatively easy to mount the engine part of the mount. However some cutting of the mount is needed so that it can clear our serpintine belt tensioner. (its a bit different setup on the 9k, so all four bolts are used, on the 900/9-3 only the upper 2 holes are used.
This is the mount how it is Stock
What needs to be cut off...
Another shot
The aluminum is pretty soft, I used a Sawzall And some wd40 shot on the blade every so often to help it along. Just put the mount in a vice and go to town, a fairly long blade on the sawzall usually makes things easier.
I left the part going down between the holes, just to add strenght to the mount, its not too crucial as this is a secondary mount however it doesnt get in the way of anything so it can stay.
Once this is done you can bolt this on to the head. I bought Stainless stell M8 1.00 thread pitch 50mm long, they probabaly could be a bit longer but these seem to work great, I also through some lock washers on there for good measure.
You also now have to decide how you want to mount the mount to the car, there are a few different ways, one being to drill a hole in the strut tower brace, that requires shortening the mount, some have welded a sleeve to the strut tower brace, and Ricot83 made a crazy SS bracket off the strut tower, but he had access to a plasma cutter and the steal. I choose my method for now as a quick way to see if this made a differnce. I am not saying its the best, and I am sure there are otherways but heres my experience so far.
Revision one
This was with the stock buhsings in the mount..they were pretty beat up, lots of RIps. Also I am sorry I dont have pics of fabricating the U mount. Honetly this part was pretty simple, however I used some pretty thick flat stock for the U bracket, and I had to use my friends Oxy/Acetylyne torch to heat up the metal enought so it would bend easy.
A hole around 10 mm was drilled in the flat stock to mount the bushing and then a small hole was drilled in the back of the U bracket to mount to a small stud that was tack welded to the quasi firewall in that area.(It is the piece that branched off the firewall and under that plastic shoruding between this and the firewall is the climate control stuff/climate air filter...might as well change it if your in there)
Now a Word about this small stud sticking from the firewall, SPATL to my knowlege was the first to notice this stud and use it, knowing it would most likely rip out, as it was only tack welded to the steal. Sure enough his did rip out, however I decided to use it for the time being to see/feel any difference. Well the first test drive I definetly noticed a difference, but shift still felt sloppy so I realigned the shifter (I have a MP short shifter) and things got better.
2 days later I popped the hood after I heard a poping sound (when going in reverse up a hill...makes sense as it put some stress on the stud), and sure enough the stud had ripped through. At this point I decided to buy the Poly bushings from Eeuoparts...30 bucks each and since they are right across the state from me they came the next day..free shipping too
I managed to almost hammer one old bushing out but it was a bitch, I wound up going back to my old highschool cause I was pretty friendly with the shop teacher and he let me use the Hydrualic press. (any machine shop or well equipped mechanic can do this for you, for very little $$ or maybe even free if your nice...another suggestion is fill the stock bushings with plumbers goop)
My next revision was to utilize the now aproximately 10 mm hole in the "firewall". I cut a piece of flat stock about 4 inches long and drilled a 10mm hole in the center of it (this is to distribute the load over a large aread to reduce any stress). I then stuck the bolt through this and then throught the "firewall" and bolted everything back up.
Well HOLY CRAP, it made a buch bigger diffrerence, for a while it made a bit of a squeaking sound, but I think that was just the burss left from the tackweld rubbing agaist the flat stock. Because of the stiffness of the poly there is some more engein noise transmitted into the cabing (almost as if you can hear the valve train werr) but its not very loud and easily concealed with music, or maybe some sound deading added behind the glove box.
Revision 2

Crappy photo of bolt throug the "firewall"
That is my mount so far, however I had many Ideas before deciding to throw this one together. My other Idea was to traingulate the mount, and put another hole in the firewall, (this would be similar to the stock 9k bracket but much longer, as seen here)
This is because My fear right now is that it is to some extent acting like a hinge, and could be mooving side to side under load...I shall see on the DYNO and hopefully post a video!!
However I dont have the time right now, and also my best friend with the welder is still at school for his last term, when he comes back in late december he is going to teach me how to weld and I am going to fabricate a new mount to my liking, for now however to remedy this problem, I will most likely take a piece of flat stock and go from the strut tower to the mount to form a "L" bracket and keep it from mooving side to side.
The results. After the Poly's I actually found the shifting to be worse :shock: , the reason I concluded was that the engine was now rotating back unevenly, as now it would rotate back on the drivers side, but stay stationsary on the passengers, still throwing off the linkage, however I did not fear because I orderd Genuine Saabs Poly mount, a month and a half ago, and with a big ordeal with backorderd (not there fault but kinda sucky lol) and then freekin UPS..see here
Well finally yesterday I got a chance to intstall it, it make a big differnce, shifting is great now, However I think the saab savior short throw shifter could make it better then the MP one, it grinds sometimes now, but I think that is just because I am not used to it working "correctly" lol Plus once the new clutch goes in the tranny is getting fresh MTL whatever it is saabs number is haha.
the tranny mount pic is in the "See Here" Link
I hope this is helpful, questions coments....post away


