
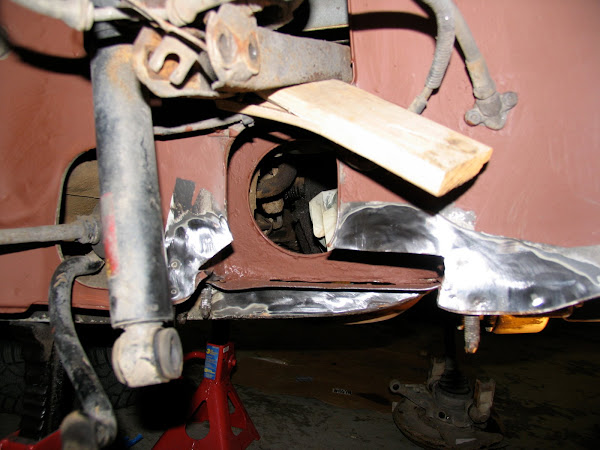
Something I did about a month ago an my Dads 92' turbo. This car has 260,000ish miles and climbing rapidly, but it still runs and drives nicely. The drivers side is still solid and the passenger side was just getting to the point where it would soon become an issue. I preferred doing it before the rust really took over as it meant less had to be replaced.
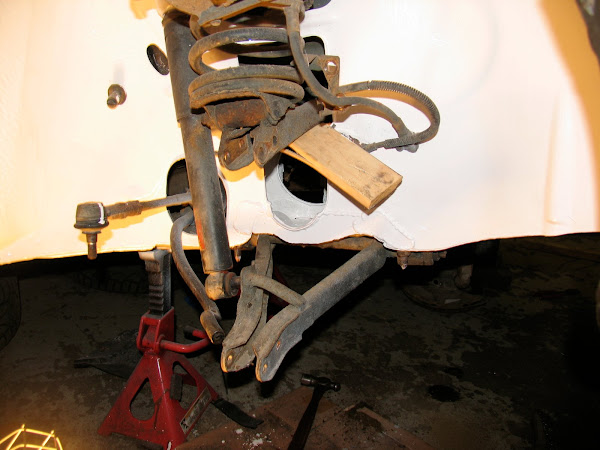
Anyway, the first step was to hit the area with a braided wire wheel and see what was rust and what was real metal. The wire wheel does a nice job busting through the rust and exposing where things are rotted away, while also cleaning the surrounding metal. After doing that I cut out all of the affected areas. I didn't do a good job remembering to take pics, so I don't have a good step by step of what I did. But here are a few to give an idea.
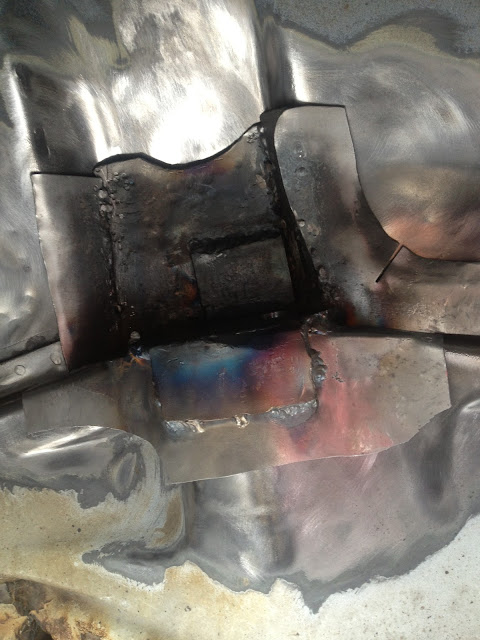
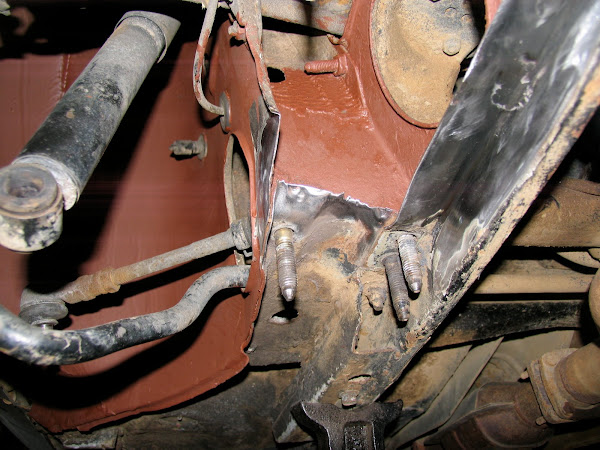
This is after cleaning the surrounding areas really well in preparation for welding, and cutting out the rust.
![Image]()
![Image]()
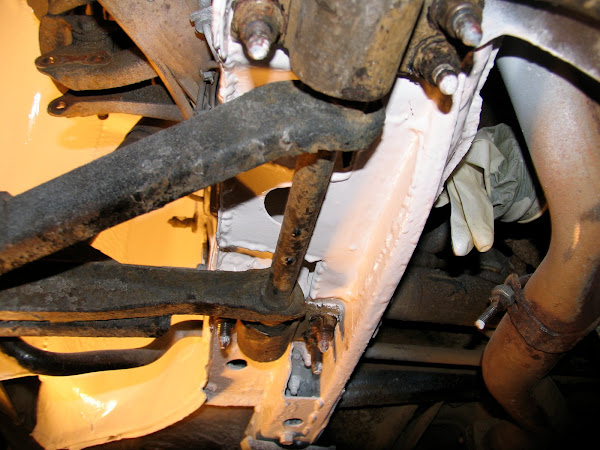
You can see I primed everything before welding the new metal in, obviously the welding burned off some of this, but with everything open like this it was easier to get into all the corners. I figured this would help me get the best coverage in the end. I also completely painted the wheel well. I used this paint in my hillcimb car and it has held up nicely, but I figured a car that does 600+ miles a week year round would be a good test of its durability.
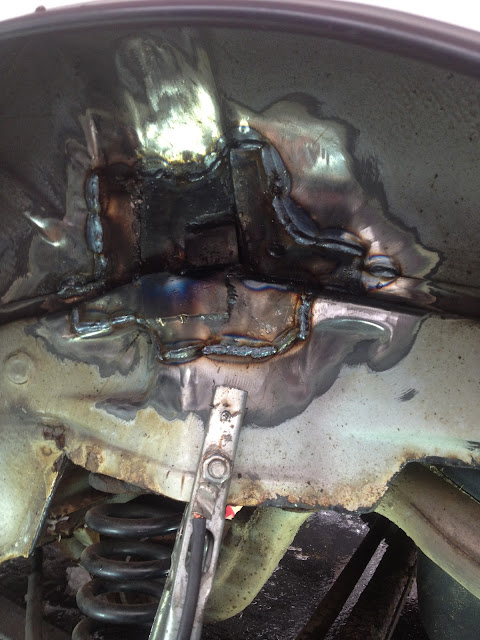
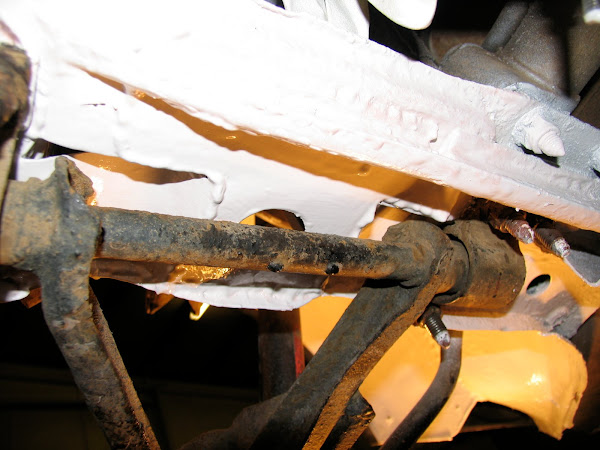
Here you can see where the body had rusted away where it was connected to the frame rail. This was originally hidden by a mix of dirt, seam sealer. I noticed a pinhole of light shining through from my worklight, and after some digging found this. I'm glad I noticed it though as it was an easy fix at this point. After cleaning up the surrounding metal a nit more I made a piece of angle out of a strip of sheet and filled the gap.
![Image]()
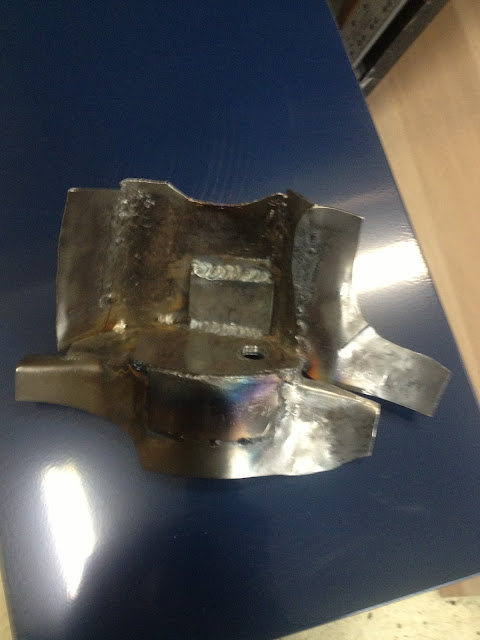
After that I made five more pieces. The first piece filled the where I cut out part of the inner wheel well, plus another curved strip welded to that to mimic the ridge that is stamped around where the drive shaft comes through. The ridge adds a lot of strength to that area, and I didn't want to leave it out.
![Image]()
This bottom section is three pieces, the middle section that bends down and buts up against the rail is one. And then the curved sections where the control arms come out are the other two.
![Image]()
![Image]()
Finished.
![Image]()
Anyway, the first step was to hit the area with a braided wire wheel and see what was rust and what was real metal. The wire wheel does a nice job busting through the rust and exposing where things are rotted away, while also cleaning the surrounding metal. After doing that I cut out all of the affected areas. I didn't do a good job remembering to take pics, so I don't have a good step by step of what I did. But here are a few to give an idea.
This is after cleaning the surrounding areas really well in preparation for welding, and cutting out the rust.
You can see I primed everything before welding the new metal in, obviously the welding burned off some of this, but with everything open like this it was easier to get into all the corners. I figured this would help me get the best coverage in the end. I also completely painted the wheel well. I used this paint in my hillcimb car and it has held up nicely, but I figured a car that does 600+ miles a week year round would be a good test of its durability.
Here you can see where the body had rusted away where it was connected to the frame rail. This was originally hidden by a mix of dirt, seam sealer. I noticed a pinhole of light shining through from my worklight, and after some digging found this. I'm glad I noticed it though as it was an easy fix at this point. After cleaning up the surrounding metal a nit more I made a piece of angle out of a strip of sheet and filled the gap.

After that I made five more pieces. The first piece filled the where I cut out part of the inner wheel well, plus another curved strip welded to that to mimic the ridge that is stamped around where the drive shaft comes through. The ridge adds a lot of strength to that area, and I didn't want to leave it out.
This bottom section is three pieces, the middle section that bends down and buts up against the rail is one. And then the curved sections where the control arms come out are the other two.
Finished.